Glitch art sounds like a mystery, but it comes down to deliberately breaking an image: offsets, streaks and noise. Nine steps take you all the way — channel offset, motion-blur streaks, a vignette for focus, interference lines, a darkening pass, then kinetic type. One photo is all the material you need.
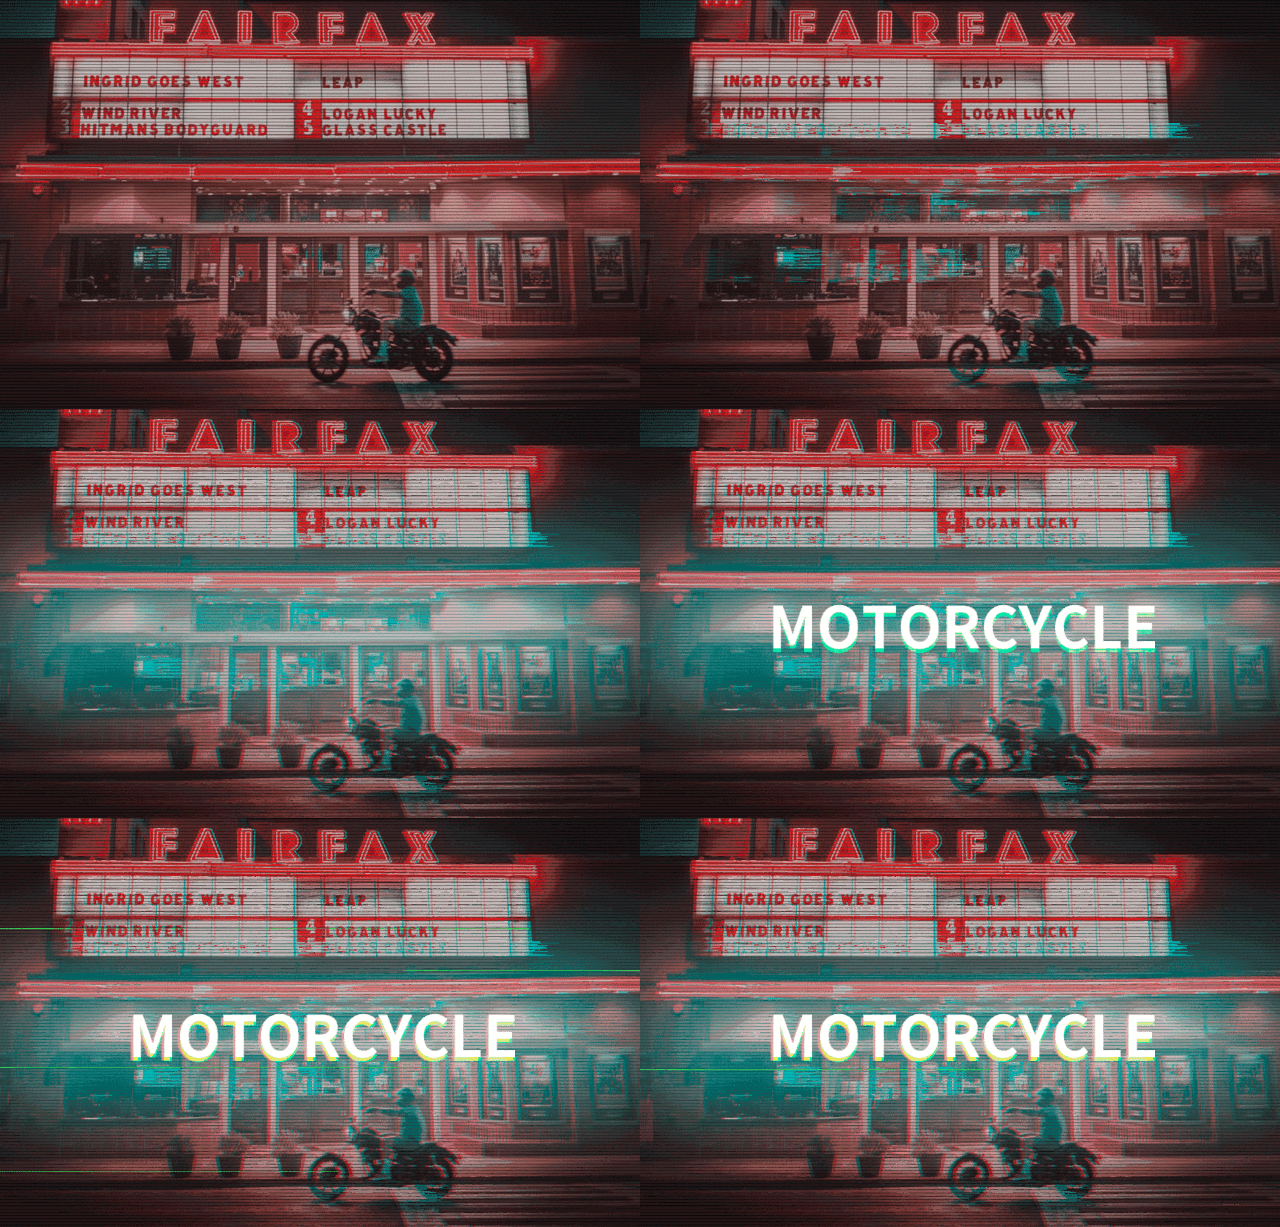
This is the famous "glitch art" look. It sounds fancy, but it is actually very easy to make. Today I'll walk you through building it in Photoshop (PS), step by step, and you can follow along with zero experience.
🧩 First, what is "glitch art"?
Simply put, it means deliberately giving an image a few small "faults", such as:
- Color misalignment (red, blue and green pulled apart)
- Streaking and shaking
- A few horizontal lines and noise
- Type that "wobbles" along with it
Put those "faults" together and the result feels futuristic, high-tech and cyberpunk. Plenty of movie posters and album covers use it.
🛠️ Let's get hands-on! Nine steps to the finish!
✅ Step 1: Pick a good photo as your source
Grab any photo you like — a portrait, a landscape, a pet, anything. The sharper it is, the more visible the effect.
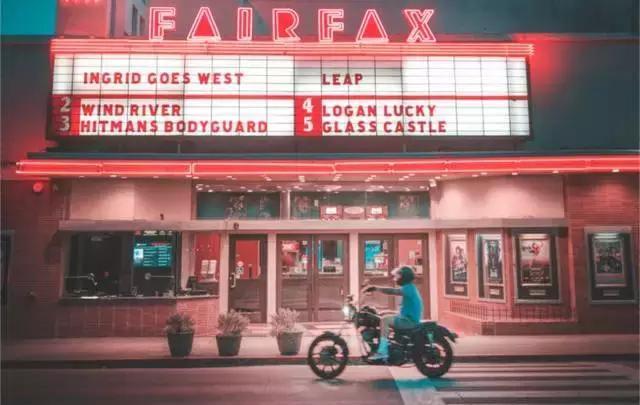
✅ Step 2: Create the color offset (the core move!)
- Duplicate the layer (Ctrl+J, or right-click the layer → Duplicate Layer)
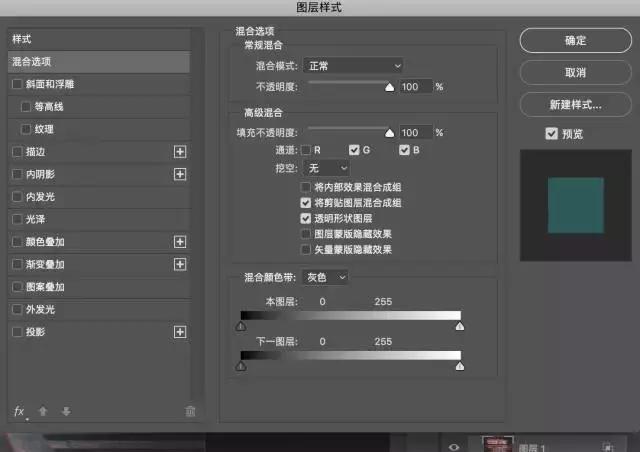
- Double-click that copy → this opens "Layer Style"
- Click "Blending Options" → under "Channels", switch off one color channel (for example "R Red" or "G Green")
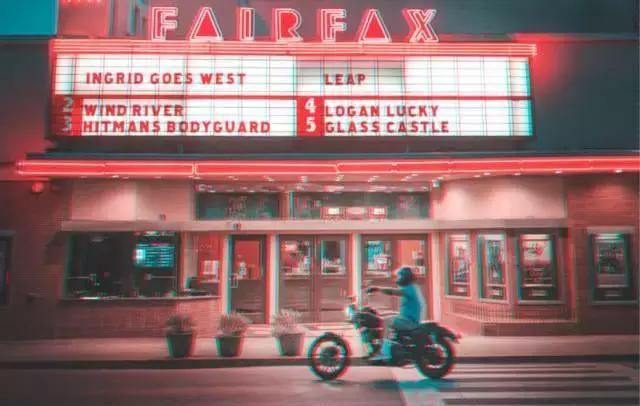
- Turning off different channels gives different color results, so try a few! - Drag this layer a few pixels left or right (3-5 pixels is plenty — don't go too far or the image just looks blurry)
✅ Effect: red/blue, red/green or blue/green "ghosting" appears along the edges. Very high-tech.
✅ Step 3: Add the "streak" effect (make the image move)
- Create a new layer
- Use the "Rectangular Marquee tool" to select any area of the photo (a face or the background, for instance)
- Ctrl+C to copy → Ctrl+V to paste onto the new layer
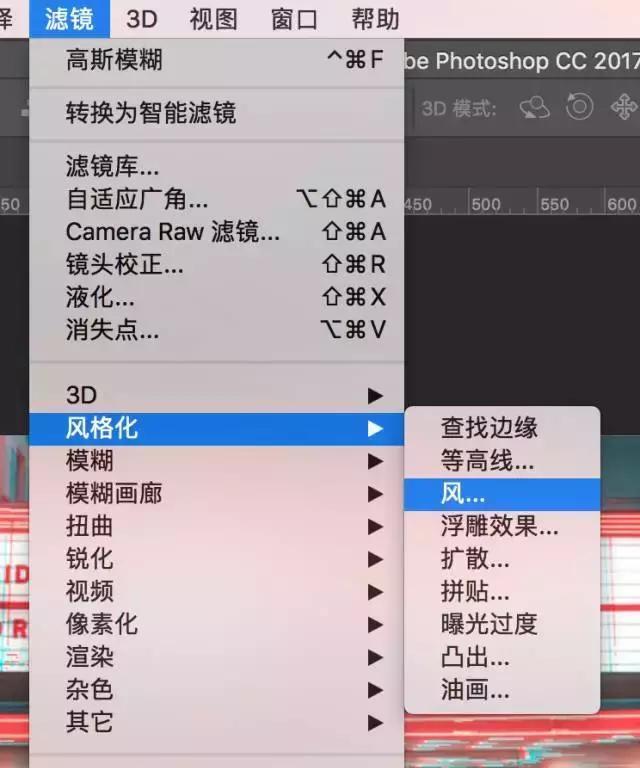
- Filter → Stylize → Wind → choose "Blast" and direction "From the Left"
- Open "Layer Style" again → "Blending Options" → switch off one channel (for example "R Red")
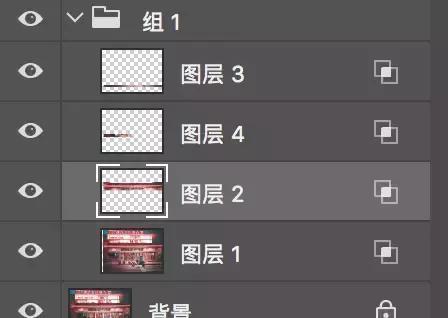
- Repeat the steps above with a few more selected areas, all turned into "wind" effects, then group them (Ctrl+G)
✅ Effect: parts of the image look as if wind has swept across them — lots of motion.
✅ Step 4: Add a vignette to pull the eye in
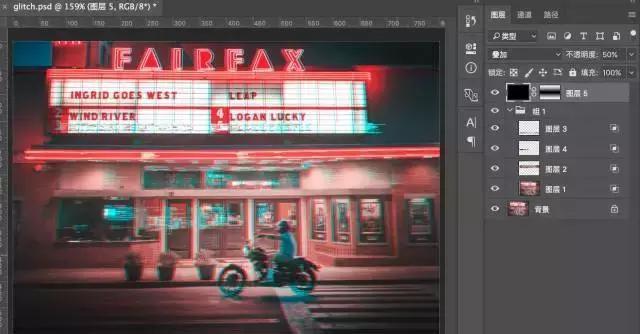
- New layer → fill it with black
- Change the layer blending mode to "Overlay"
- Add a "mask" to this black layer
- Use the "Gradient tool" to drag a radial gradient that is "black in the middle, white at the edges"
- Set the layer's "opacity to about 50%"
✅ Effect: the edges of the frame darken, so the center stands out.
✅ Step 5: Add "signal interference" lines (a classic element!)
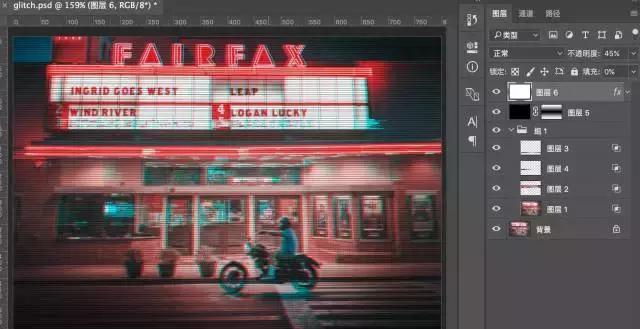
- New layer → fill it with any color (gray, for example)
- Double-click the layer → "Layer Style" → "Pattern Overlay"
- Choose the "Horizontal Line" pattern and set the blending mode to "Multiply"
- Set the layer's "Fill to 0%" and raise the opacity to "about 45%"
✅ Effect: faint horizontal lines appear, like an old TV with no signal.
✅ Step 6: Darken the overall tone (adds atmosphere)
- New layer → fill it with a dark color (deep red #270e0e, for example)
- Change the layer blending mode to "Darken"
- Set the opacity to "about 20%"
✅ Effect: the whole image gets darker, with more mystery and a techy feel.
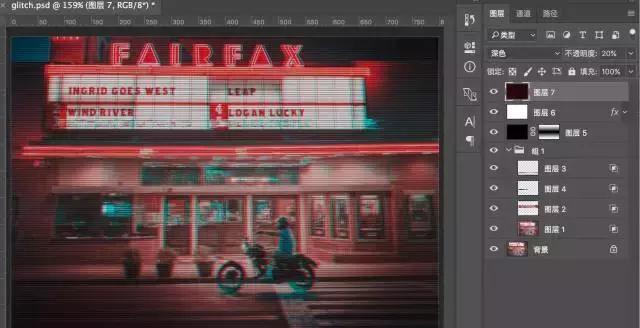
✅ Step 7: Add "kinetic type" (the finishing touch!)
- New layer → use the "Rectangular Marquee tool" to draw a rectangle → set the feather radius to 50 → fill it with bright green
- Change the blending mode to "Linear Dodge (Add)" and the opacity to 45%
- Type your text (something like "GLITCH" or "FUTURE")
- Duplicate the text layer twice
- First copy: Layer Style → Blending Options → switch off the "GB" channels → move it a few pixels to the lower left
- Second copy: Layer Style → Blending Options → switch off the "RB" channels → move it a few pixels to the lower right
- Put both copies below the original text layer!
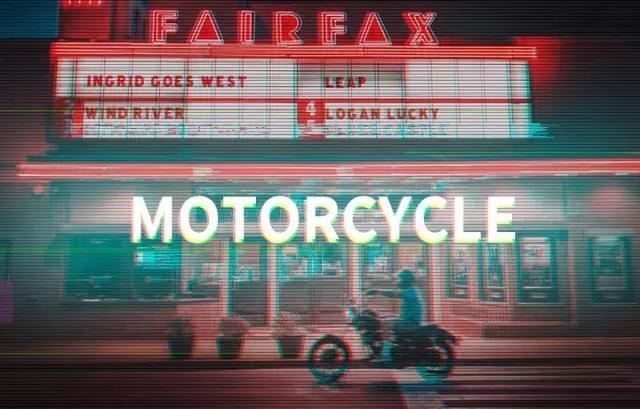
✅ Effect: the type picks up the same red/blue/green offset. Very flashy.
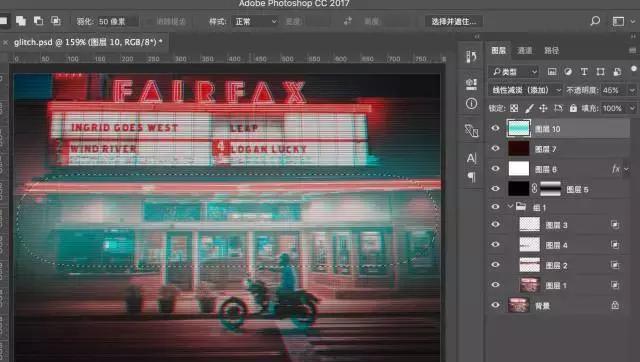
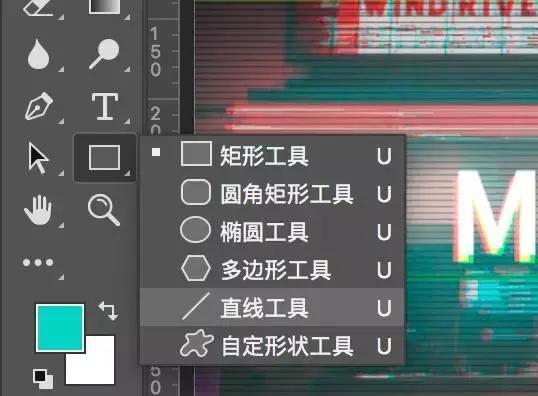
✅ Step 8: Add "random lines" (extra detail)
- Use the "Line tool" or the "Rectangle tool" to draw thin lines or small squares in empty areas of the image
- Adjust the "opacity" of each line so some are bright and some are dim
- Draw freely — it doesn't need to be tidy. The messier, the more "glitchy" it looks.
✅ Effect: richer detail and a serious tech vibe.
✅ Step 9: See the final result!
With every step done, your glitch art piece is ready.
💡 Going further: if you know your way around PS's "Timeline", you can turn this into an animated GIF, like this 👇
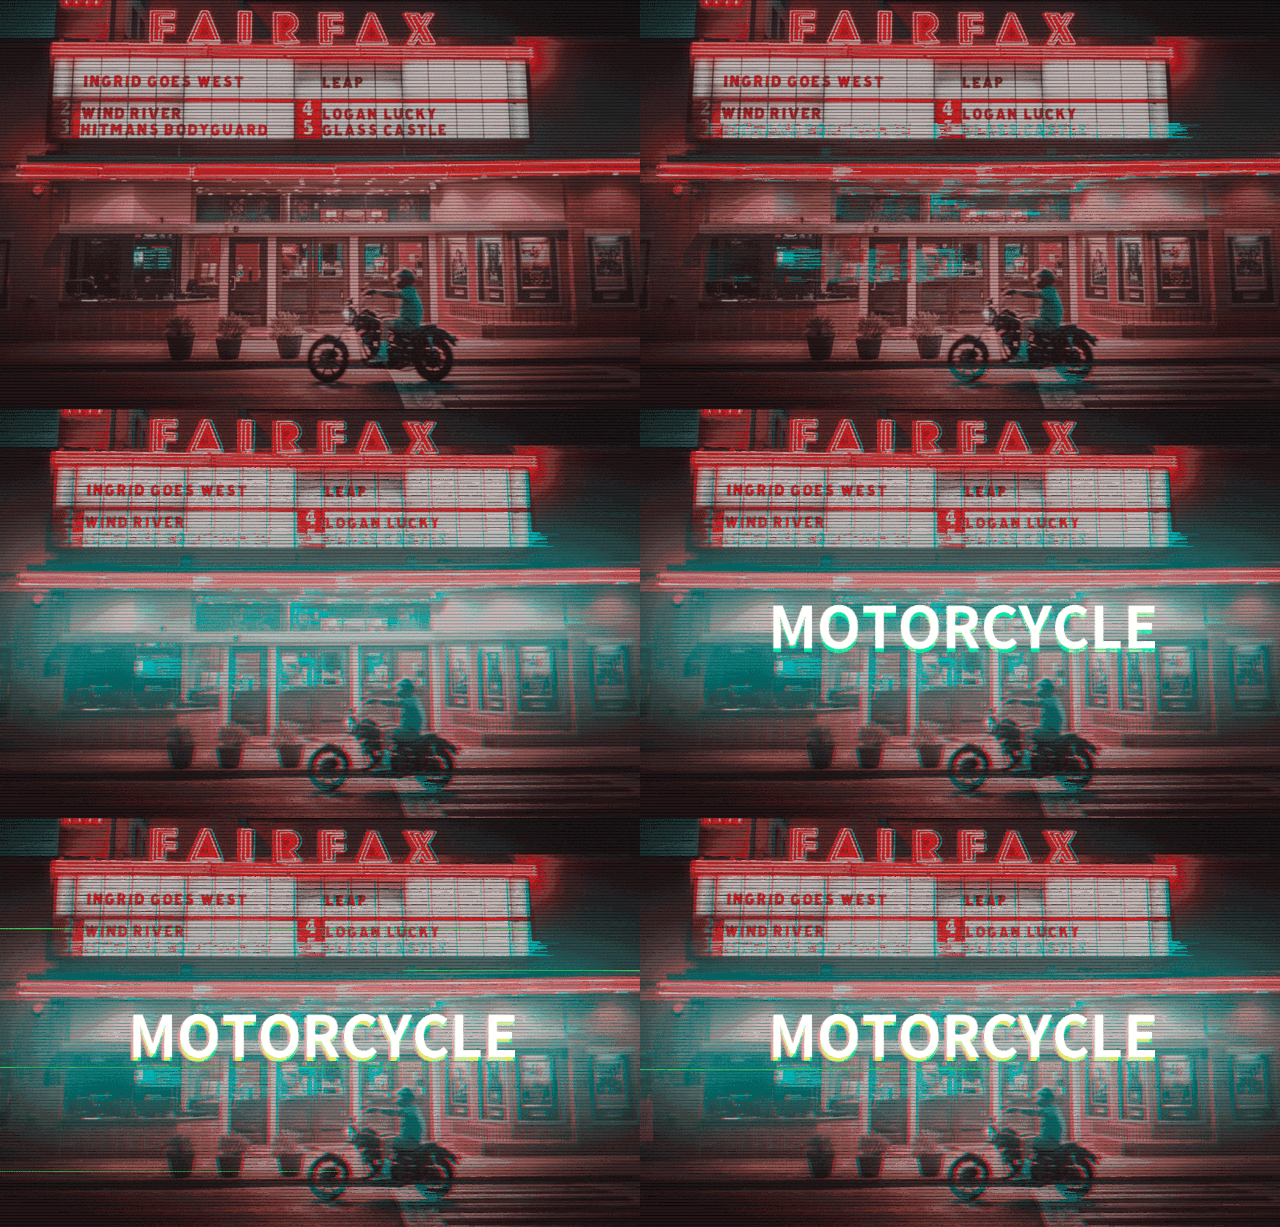
🎉 To sum up:
| Step | Core action | Effect |
|---|---|---|
| 1 | Duplicate layer + turn off a channel + move it | Color offset |
| 2 | Copy an area + Wind filter + turn off a channel | Streaking motion |
| 3 | Black layer + gradient mask | Vignette focus |
| 4 | Pattern Overlay + horizontal line | Signal interference |
| 5 | Dark layer + Darken blending mode | Overall darkening |
| 6 | Type + copied layers + offset channels | Kinetic type |
| 7 | Draw random lines | Extra detail |
Once you have the hang of it, you can push any photo into this glitch look. Give it a try!