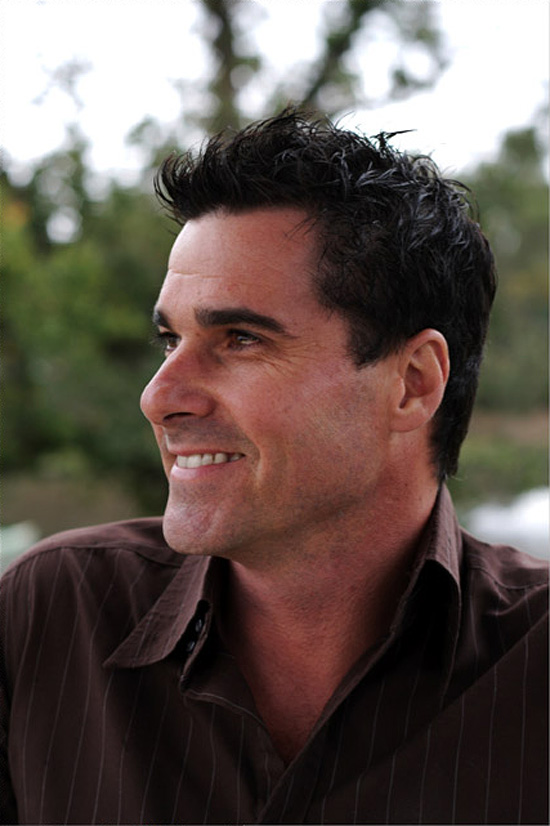
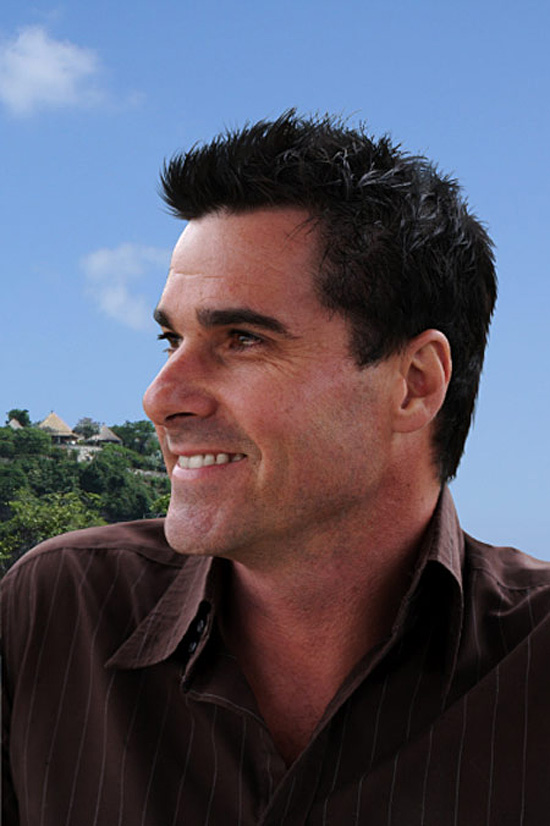
The Pen tool alone can't pull out a fluffy hair edge — the Smudge tool fills in the rest. Trace the main outline with the Pen, copy it to a new layer, then switch to a small brush and draw the flyaway strands one by one. Step five swaps in a new background to check the result. On Online PS, patience matters more than technique.
1
✅ Step 1: Open the image and trace an outline with the Pen tool
- Open PS (or zaixianps.cc) and drag your photo in.
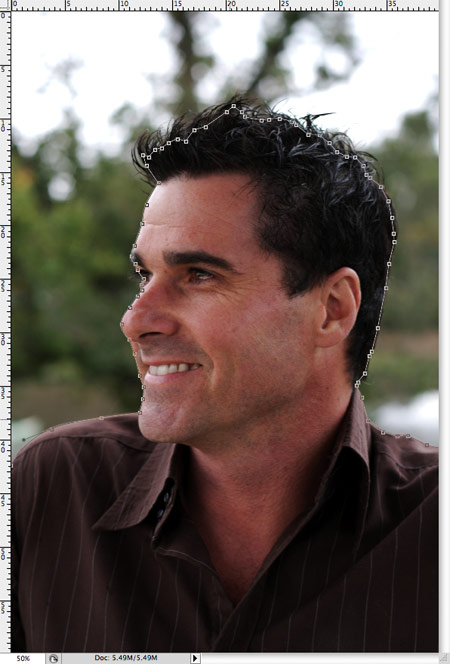
- Select the [Pen tool] (shortcut P) and slowly trace a path around the clearly defined edges of the subject.
- Where the hair is very messy and merges into the background, leave it for now! Trace only what you can see clearly.
- For example: the face shape, shoulders and the edges of clothing — the hard contours.
📌 Tip: the path doesn't need to be perfect. Just enclose the "main subject"; the detail comes later.
2
✅ Step 2: Copy the traced part to a new layer
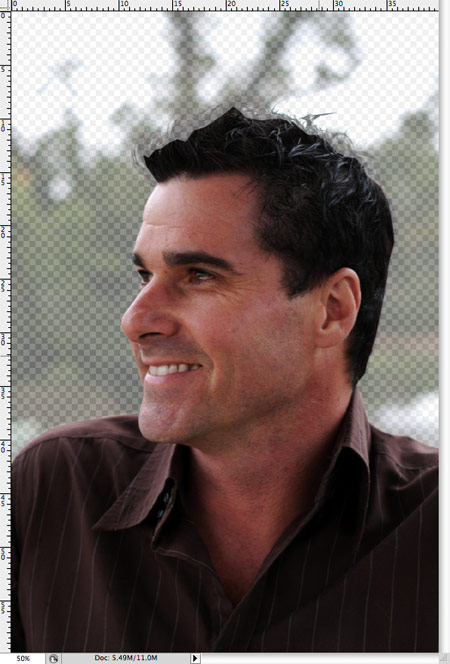
- When the path is done, press
Ctrl+Enterto convert it into a selection. - Press
Shift+F6and set the feather radius to0.2px(this keeps the edge natural rather than hard). - Press
Ctrl+Jto copy the selected area onto a new layer. - Go back to the original layer and lower its opacity (to 50%, for example) so you can still see the hair outline underneath — handy when you "add hair" later.
3
✅ Step 3: "Paint" the hair strands by hand with the Smudge tool
This is the main event! 🎉
- Select the [Smudge tool] (find it in the toolbar — the icon looks like a pointing finger).
- Set the brush size to
4px(start a little thicker; it's easier to control). - On the hair edges of the new layer, gently drag along the direction of the hair showing through from the original below.
- It's like "drawing" the hair, following the original direction.
- Where there's a gap, "add" hair; where it's thin, make it denser.
📌 A graphics tablet is better: pressure control lets you draw strands of varying thickness.
📌 No tablet? No problem: a mouse works too. It's slower, but the result is just as good.
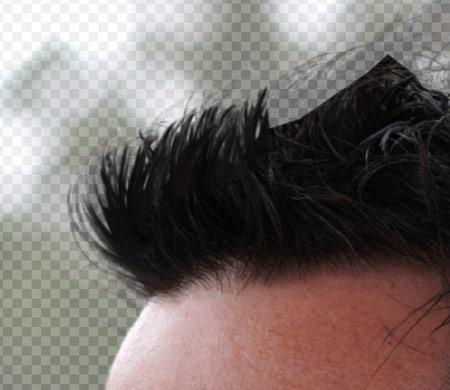
4
✅ Step 4: Switch to a small brush for curls and details
- Reduce the brush size, for example to
2px. - Keep dragging along the hair edges, this time with more precision:
- Draw the little wavy curls.
- Give the hair layers and a sense of direction.
- Pull in a few different directions to create a realistic, uneven look.
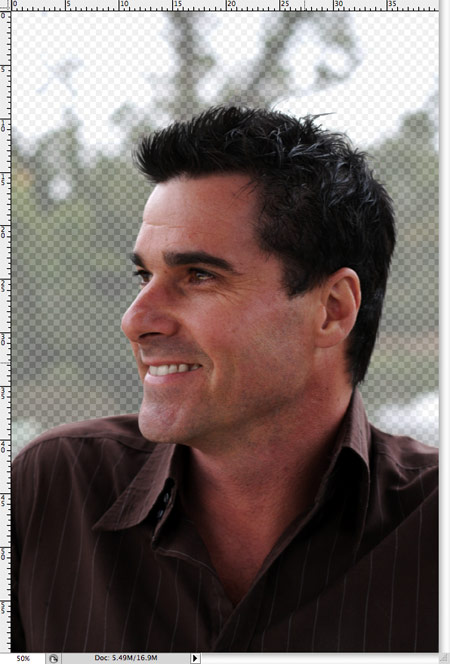
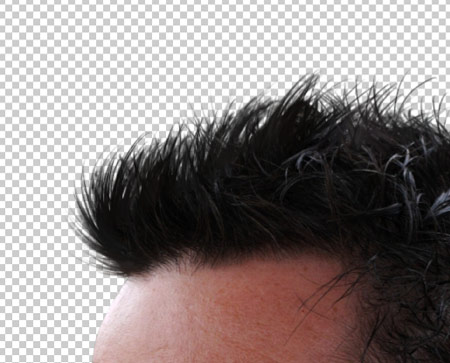
5
✅ Step 5: Swap the background — done!
- Drag in the new background image you want and put it at the very bottom.
- Adjust the position and size and check the result.
- Save as PNG (transparent background) or JPG (with background), and you're finished!
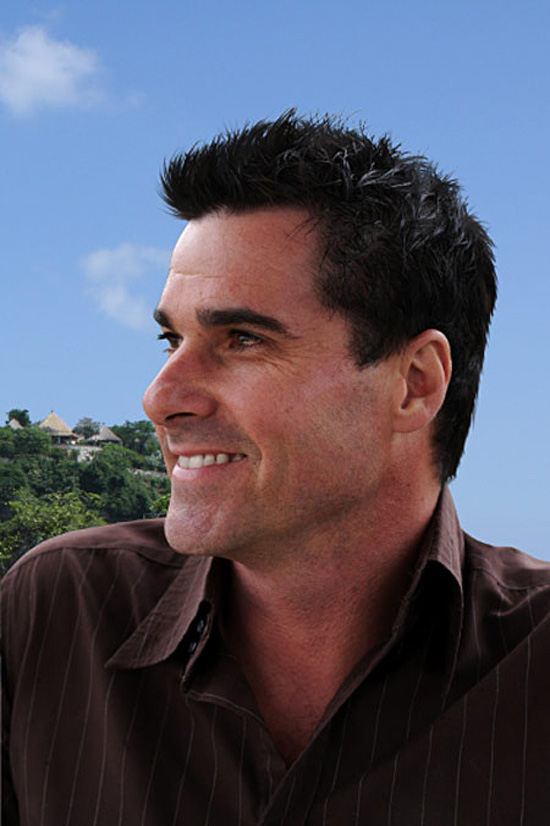
💡 Key points at a glance:
| Step | Key action | Trick |
|---|---|---|
| 1 | Trace the outline with the Pen | Trace only the clear parts and leave the blurry ones |
| 2 | Copy the selection + lower the opacity | Makes it easy to reference the original when adding hair |
| 3 | Fill in strands with the Smudge tool | "Draw" along the direction of the original |
| 4 | Small brush for the details | Build curls and a sense of depth |
| 5 | Swap the background | Free rein — put it wherever you like |
🎯 Who is this for?
- Anyone who retouches photos for friends, makes posters or swaps backgrounds
- Online sellers who need clean product and model shots
- Beginners studying design or learning PS
- Perfectionists who don't mind the fuss 😄
Once you have this method down, no "furry and messy" image will scare you again. Give it a try!