Corroded lettering comes from pairing filters with Levels. The Sponge filter roughens the edges, Color Range lifts the dark areas onto their own layer, a bevel gives them depth, and the background gets noise and blur. Color the two layers differently and the contrast does the rest.
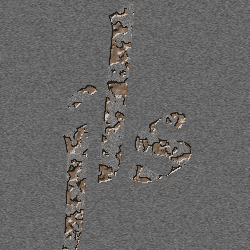
✅ Preview of the final result
Here is what we are aiming for: rough edges, a recessed interior, deep color and an overall vintage, corroded feel.
🖼️ Step 1: New canvas + type → set up the base letters
- Open PS → [File] → [New] → set 250x250 pixels with a white background
- Choose the [Type tool] T → type the word you want, "RUST" for example
- Right-click the type layer → [Rasterize Layer] → rename it "Not Etched"
📌 Tip: pick a heavier font such as "Impact" or "Arial Black" — the effect reads much more clearly.

🖼️ Step 2: Add the "sponge corrosion" → roughen the edges
- Hold Ctrl and left-click the type layer thumbnail → the text area is selected
- Menu bar: [Filter] → [Artistic] → [Sponge]
- Set the parameters:
- Brush size: 2
- Definition: 25
- Smoothness: 2
🎯 Effect: the edges of the letters turn rough, as if rubbed with a sponge — that is the first hint of "corrosion".
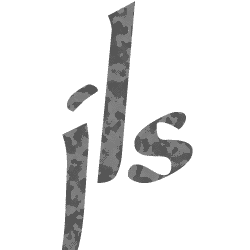
🖼️ Step 3: Select the "dark" areas → separate the etched part
- Menu bar: [Select] → [Color Range]
- Use the eyedropper to click the darkest spot inside the letters (the middle of a stroke, for example)
- Set Fuzziness to around 50 → click OK
🤔 Why do this? Because we want the "dark areas" to look like the part that has been etched into the surface.
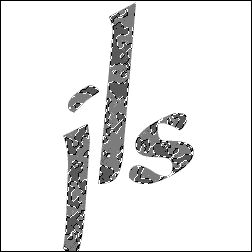
🖼️ Step 4: Cut out the "etched layer" + add a bevel → create the recessed look
- Menu bar: [Layer] → [New] → [Layer via Cut] → rename it "Etched"
- Double-click this new layer → open "Layer Style" → choose [Bevel and Emboss]
- Settings:
- Style: Inner Bevel
- Direction: Down
- Depth: 20
- Blur: 0
🎁 Effect: the "Etched" layer now looks as if it has been dug into the surface, giving it depth.
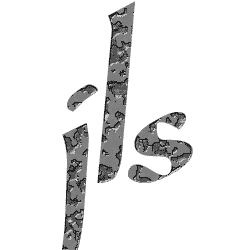
🖼️ Step 5: Add "noise + blur" to the background → an old-paper feel
- Go back to the background layer → fill it with the same color as the "Not Etched" layer (light gray or off-white)
- Menu bar: [Filter] → [Noise] → [Add Noise] → set the value to around 12
- Add noise to the "Not Etched" layer as well (a smaller value, 8 for example)
- Back to the background layer → [Filter] → [Blur] → [Motion Blur]
- Blur value: 1-2 pixels
- Angle: 0 degrees
📜 Effect: the background looks like aged paper, with a little grain and smear — very vintage.
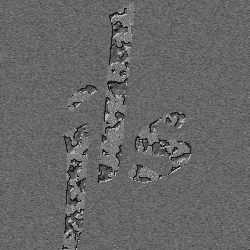
🖼️ Step 6: Color the "etched layer" → make it look corroded
- Select the "Etched" layer → menu bar: [Image] → [Adjustments] → [Hue/Saturation]
- Tick [Colorize] in the bottom-left corner
- Drag the sliders to the color you like (dark brown, moss green and rust red all work well)
🎨 Trick: staying in the darker range gives a stronger "corroded" feel.
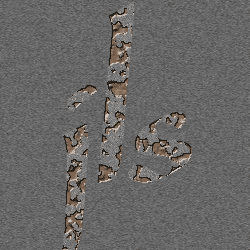
🖼️ Step 7: Fine-tune the "not etched layer" → harmonize the two layers
- Select the "Not Etched" layer → menu bar: [Image] → [Adjustments] → [Levels]
- Drag the small triangle in the middle (the gray slider) slightly left or right
- Goal: make the "Not Etched" color sit more comfortably with the "Etched" layer
✅ Done! You now have a convincingly "corroded" piece of etched lettering.
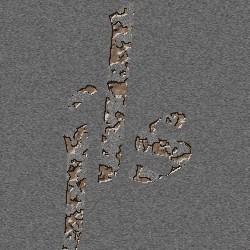
🧩 Summary: the 7 key steps at a glance
| Step | Action | Purpose |
|---|---|---|
| 1 | New canvas + type + rasterize | Set up the base letters |
| 2 | Ctrl+click to select + Sponge filter | Create the corroded edges |
| 3 | Color Range to select the dark areas | Separate the "etched" region |
| 4 | Layer via Cut + Bevel and Emboss | Create the recessed depth |
| 5 | Noise + motion blur on the background | Build the old-paper texture |
| 6 | Hue/Saturation with Colorize | Recolor the etched part |
| 7 | Fine-tune with Levels | Harmonize the two layers |
💡 Extra tips
- If you don't want to install PS, you can work directly in the free online tool zaixianps.cc!
- The bolder the font and the stronger the color contrast, the more striking the result.
- Try different color combinations — bronze etch, rust red, verdigris and so on.
✅ Now you know what to do at every step!
👉 Follow along with the images, and even a complete beginner can nail the "corroded etched lettering" look with ease.