There are three ways to cut out a monkey's fur, and this tutorial lines them up side by side: the plugin route is convenient but limited, the channel route suits experienced hands, and the Extract filter is the most dependable. It closes with a two-pass approach — white hairs first, then black — and that same thinking can break down any complicated fur in Online PS.
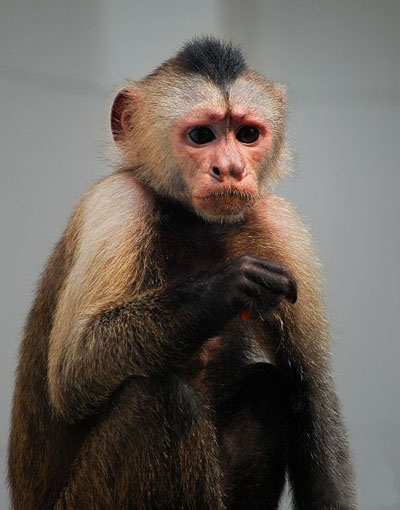
🧪 Method 1: quick cutout with a "plugin" (Knockout 2.0)
✅ Pros: fast, simple, beginner-friendly
❌ Cons: detail is easily lost!
Steps:
- Double-click the layer to unlock it (otherwise it can't be edited)
- Open the plugin → select the monkey → draw the inner and outer rings → click "OK"
- Export the image
⚠️ Result: a failure!
Most of the fur came out, but in two places (circled in red) the fur was "eaten" — not precise enough.
🧪 Method 2: cut out with "channels" (a pro favorite)
✅ Pros: precise, good for complex edges
❌ Cons: easily leaves a "grayish" background!
Steps:
- Open the "Channels" panel (next to the Layers panel)
- Look at the red, green and blue channels → you'll find:
- Red channel: good for pulling out the white hairs
- Blue channel: good for pulling out the black hairs
- Cut out the two parts separately → merge the layers
⚠️ Result: still a failure!
The fur came out, but the background turned into a gray haze, and I'm not sure why… (the original author never worked it out either 😅)
🎯 Method 3: the ultimate answer — the "Extract filter" in separate passes (recommended!)
✅ Pros: the finest result, ideal for mixed black and white fur
❌ Cons: a few more steps, but worth it!
✅ Step 1: pull out the white hairs first
- Duplicate the background layer (Ctrl+J)
- Press
Ctrl+Alt+Xto open the "Extract" command - Paint over the whole monkey with the highlight brush → tick "Force Foreground" → set the color to "white"
- Click "OK" to get the white-hair layer
✅ Step 2: add a dark green background to check the result
→ The strands are crisp. Perfect.
✅ Step 3: pull out the black hairs
- Duplicate the background layer once more
- Press
Ctrl+Alt+Xagain → "Extract" as before - This time change the "Force Foreground" color to "black"
- Click "OK" to get the black-hair layer
✅ Step 4: merge the two layers + clean the edges
- Put the dark green background at the bottom → both the black and white hairs look razor sharp
- Turn off the original background layer → confirm there is no gray haze left
- Merge the "white hair layer" and the "black hair layer"
- Use the "History Brush" to restore the monkey's body (so the subject reads as solid)
✅ Final step: swap in a new background!
Drag the cut-out monkey onto a new background → done!
💡 To sum up:
| Method | Best for | Recommended? |
|---|---|---|
| Plugin cutout | Quick jobs where detail doesn't matter | ❌ |
| Channel cutout | Images with strong edge contrast | ⚠️ Has pitfalls |
| Extract filter in passes | Mixed black and white fur, high precision | ✅ Strongly recommended |
🛠️ Tips:
- If you don't have PS, you can use the free online tool zaixianps.cc instead!
- When cutting out, zoom in and take your time — there's no rush.
- Practice a few times and you'll be a cutout master too!
✅ Now you know what to do at every step!
👉 Follow along with the images, and even a complete beginner can handle "fur cutouts" with ease.